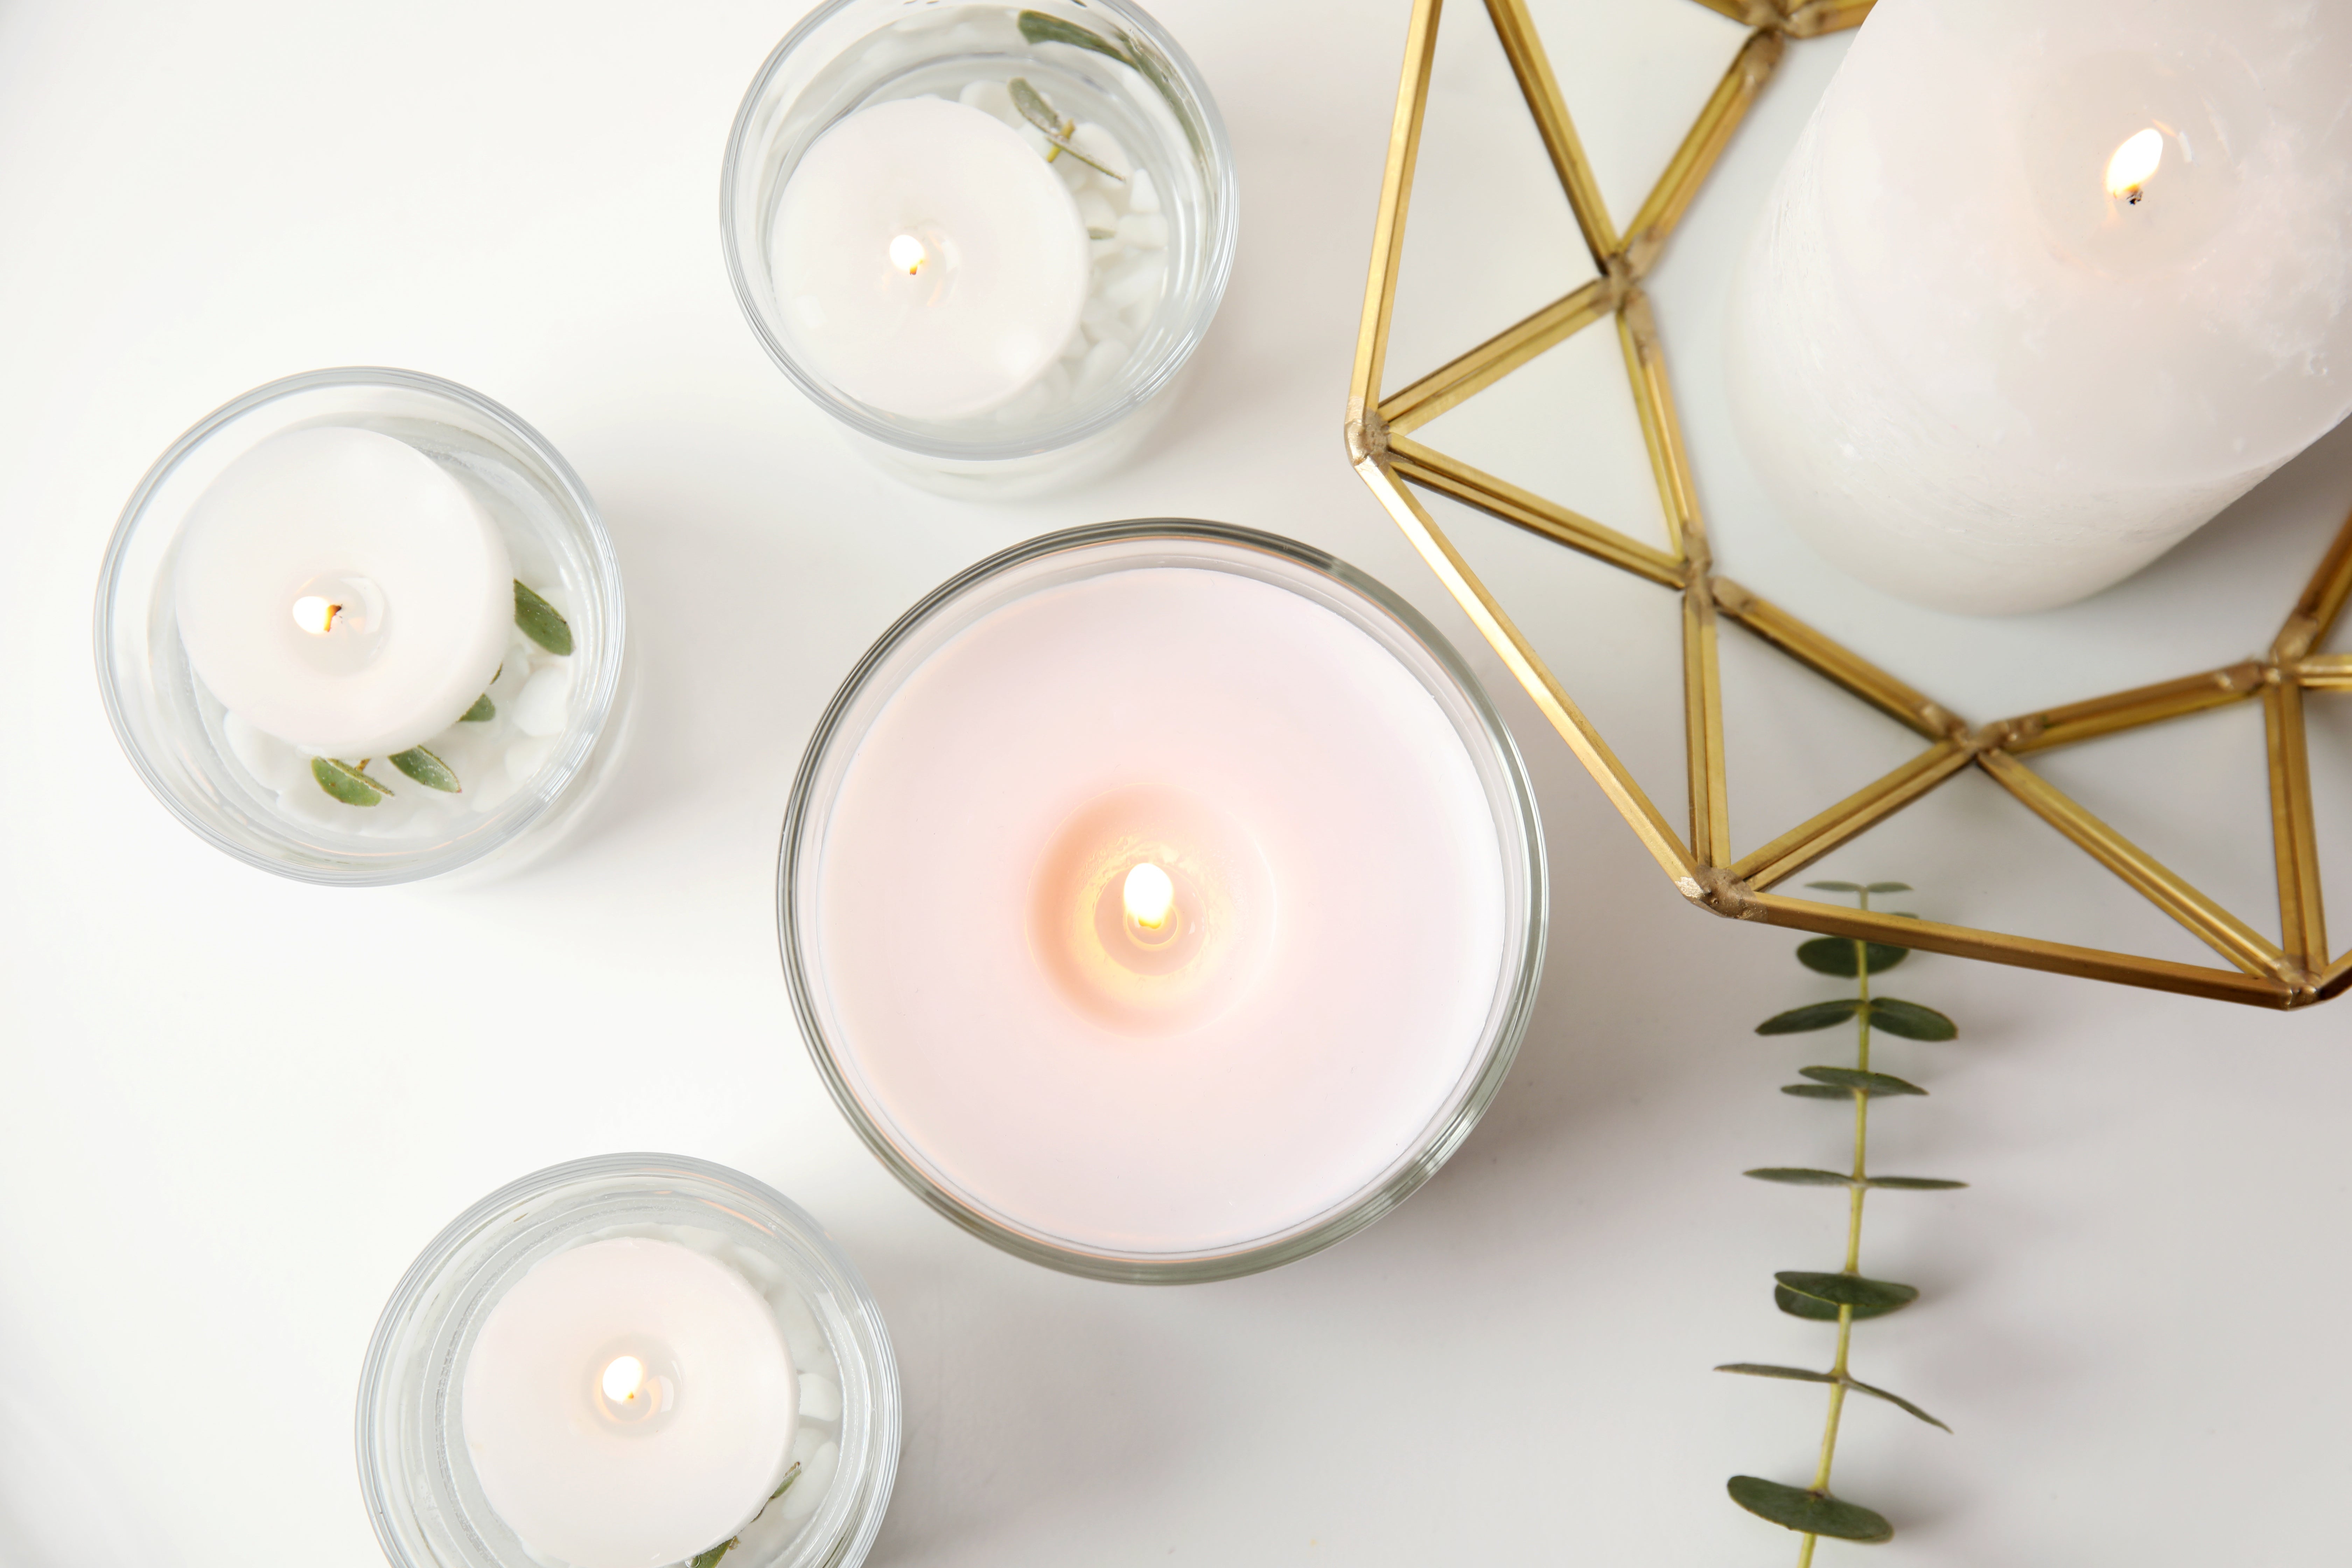
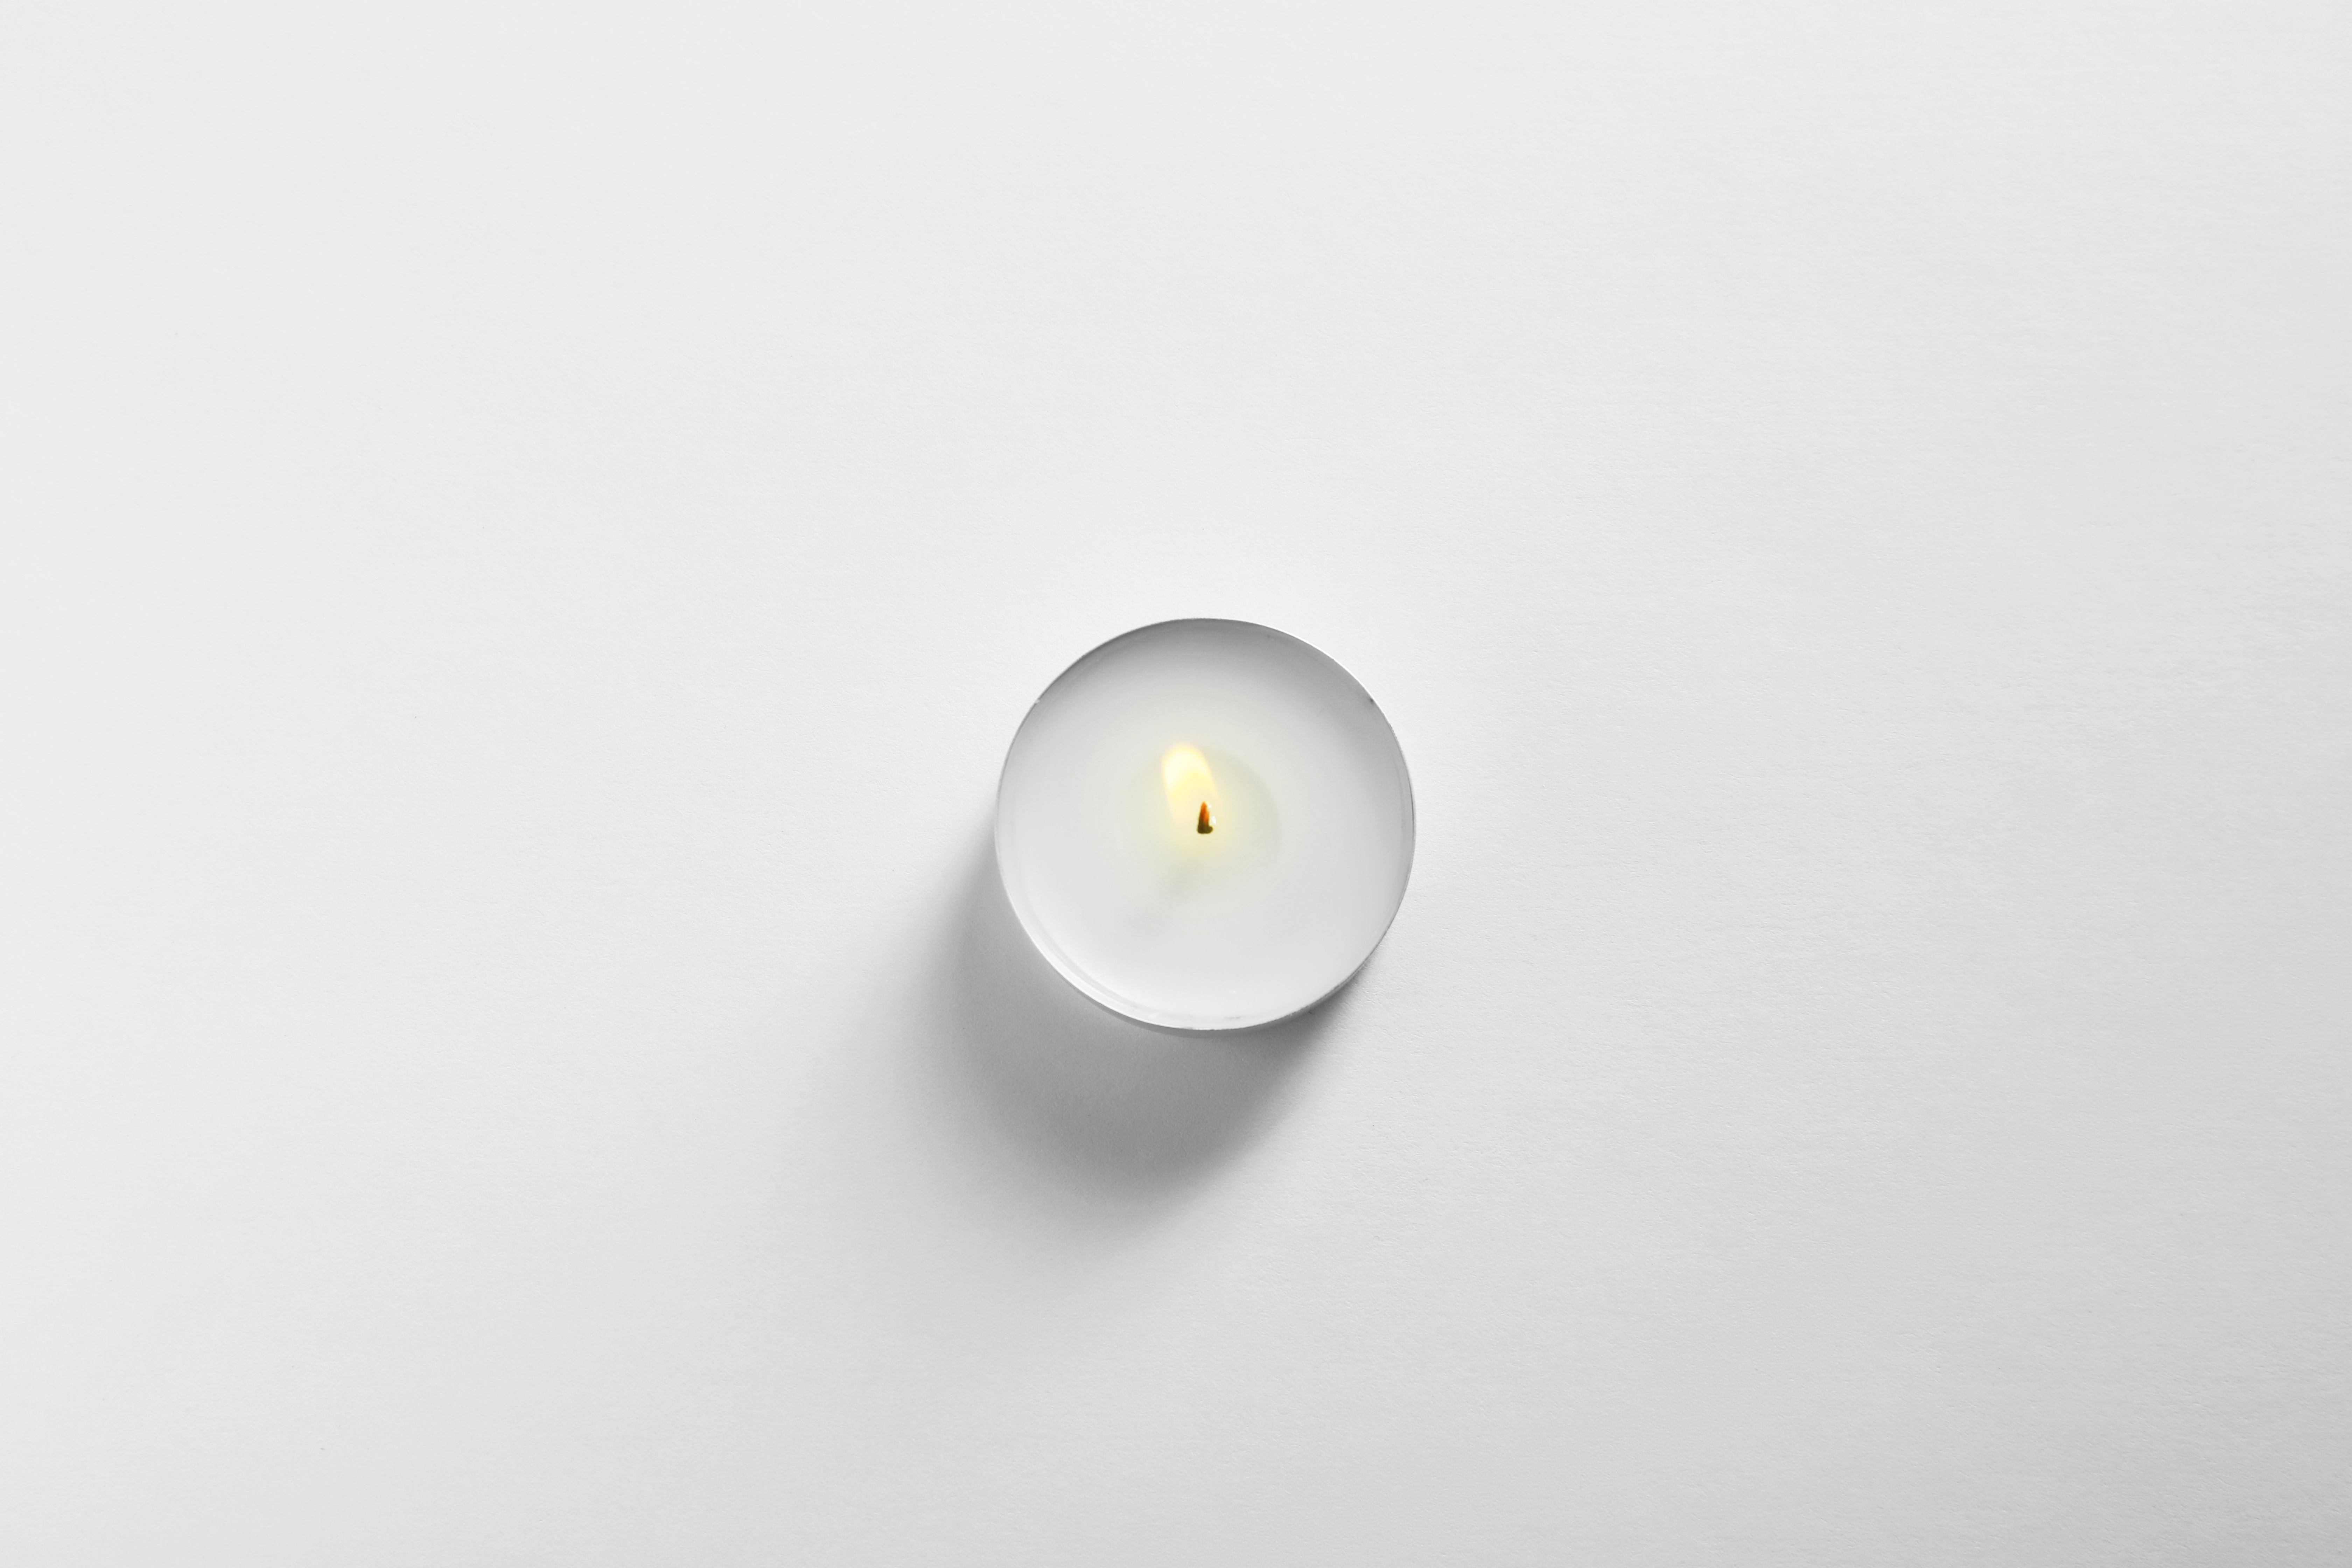
It is admittedly one of the most annoying sights to see when your candle starts tunneling. A total nuisance! Especially when you've invested good money for your favorite candles just to find them turning ugly and getting wasted. 🕯️ Unfortunately, this happens to any candles regardless of the price.
Time to stop missing out on your candles' full potential! Here are 5 simple and effective ways to fix it:
How to Fix Candle Tunneling
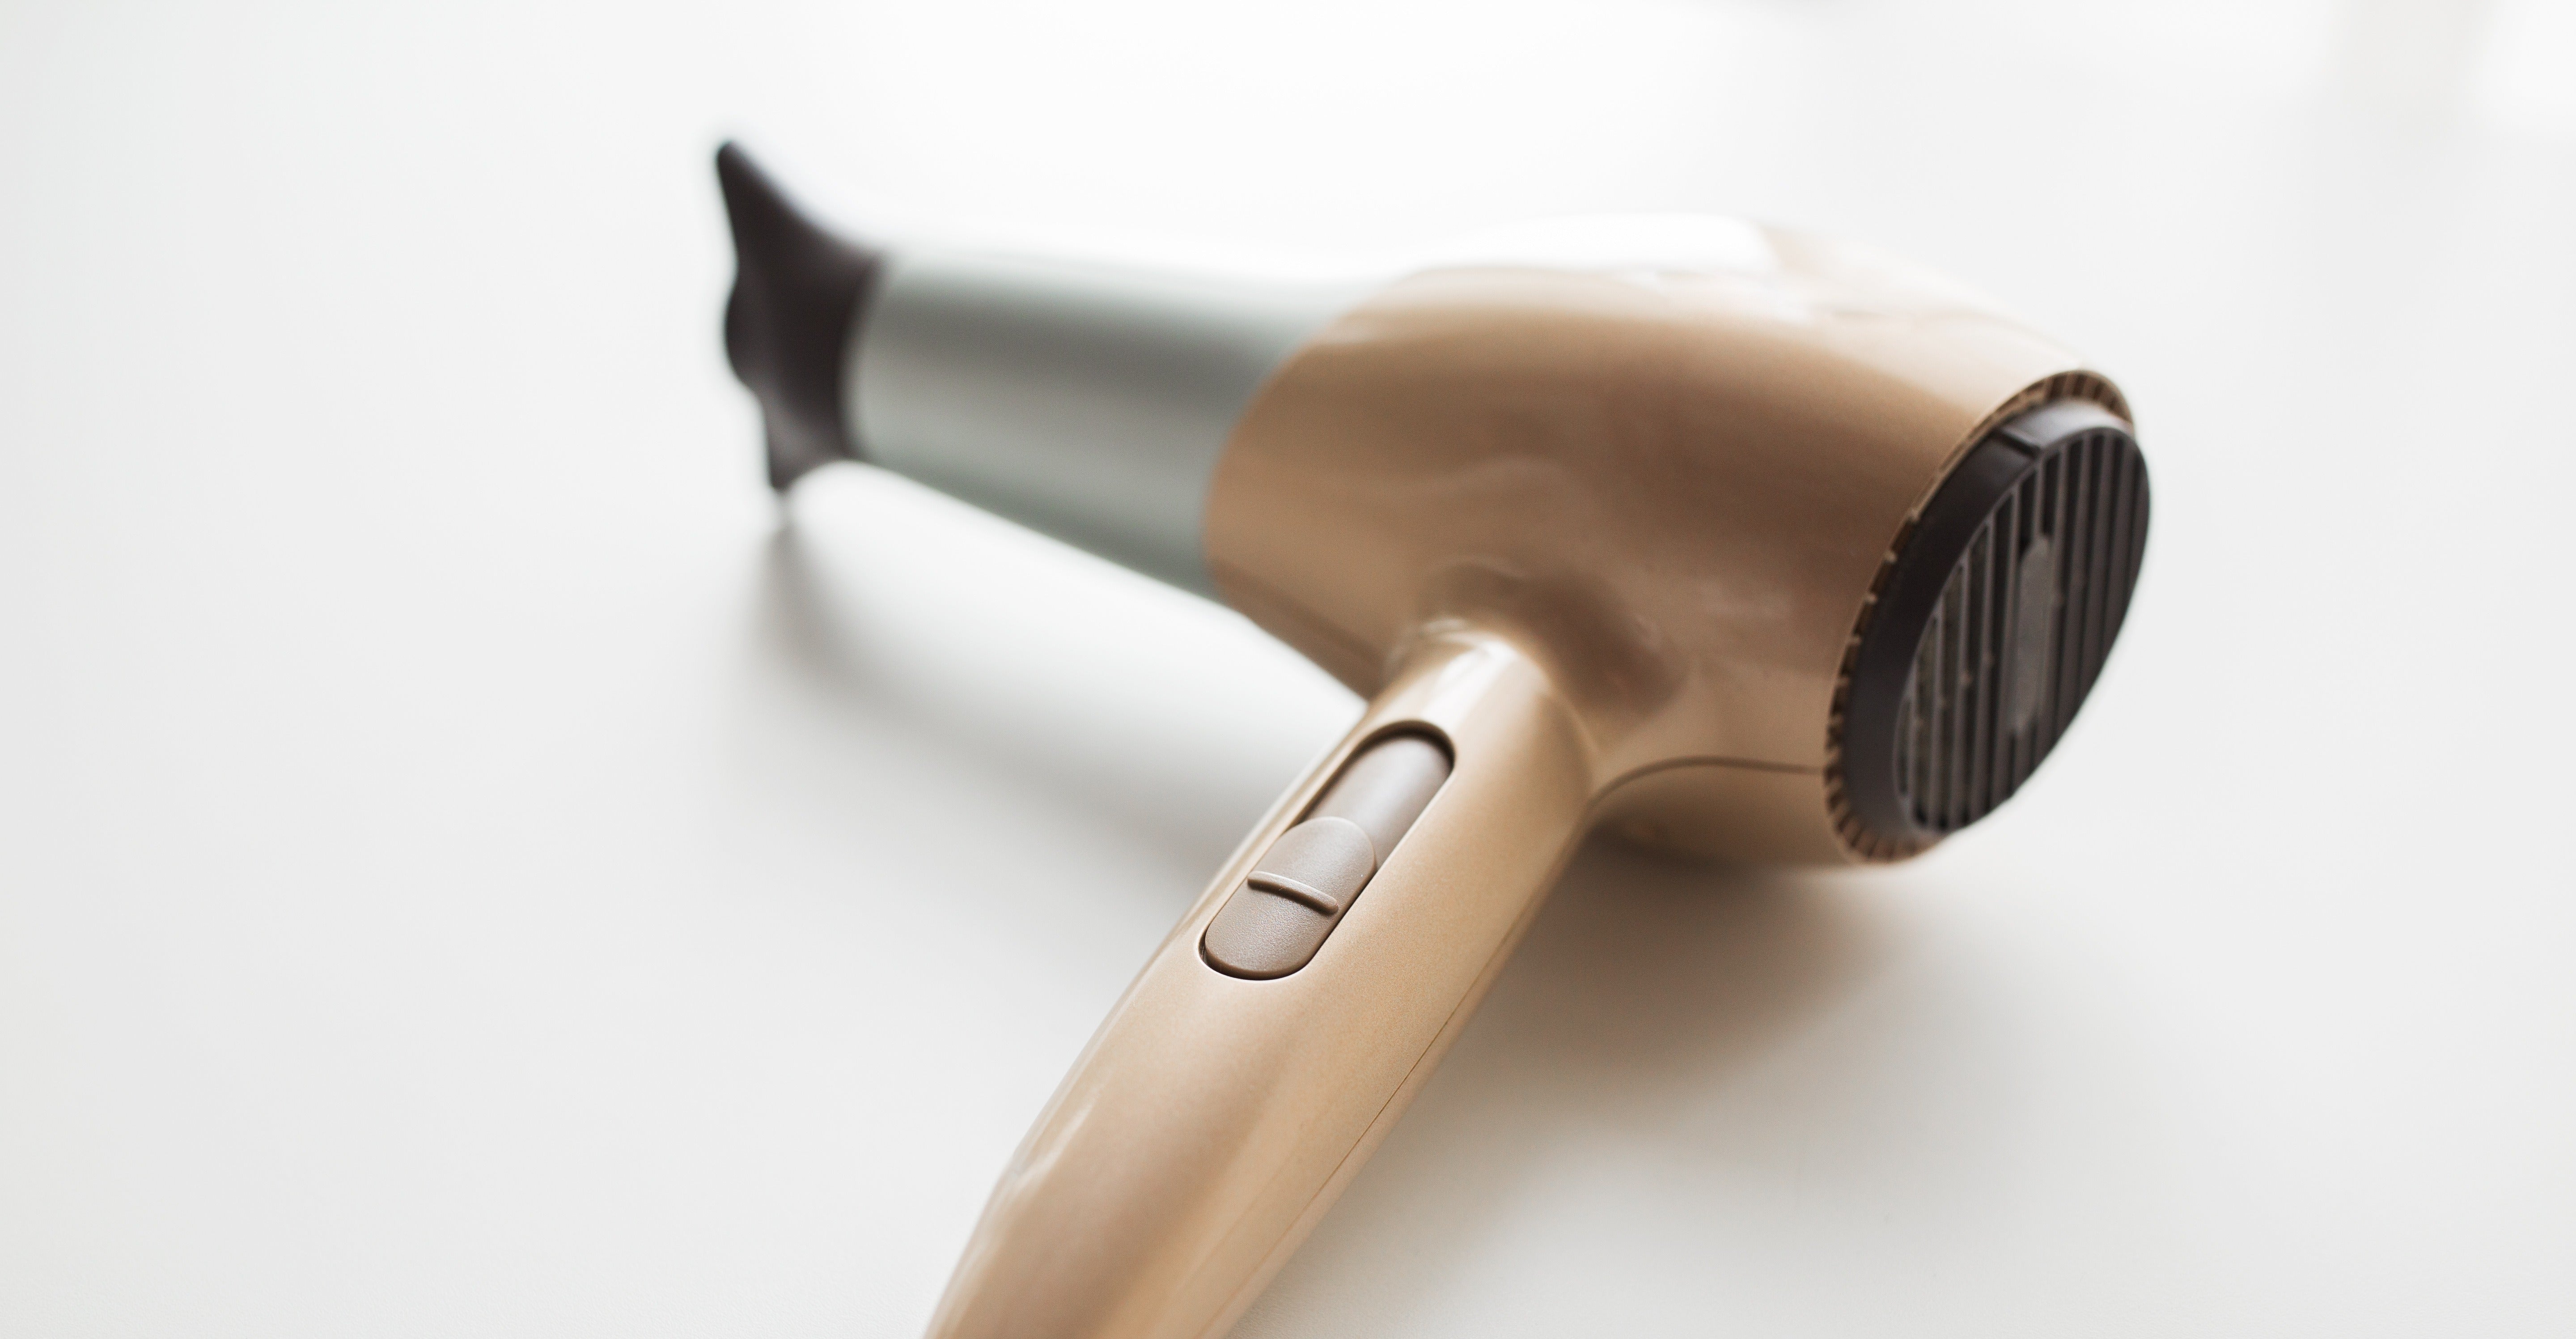
1. Use your handy hairdryer.
Turn your hairdryer on to the "Hot" or "Heating" option.
Direct the hot air towards the uneven sides of your candle.
Workaround this portion of uneven wax to spread it evenly.
Keep at it for a minute or two depending on the heat from your blower.
NOTE: Avoid pointing your blower to only one section for too long because you might burn the candle wick from prolonged overexposure to heat.
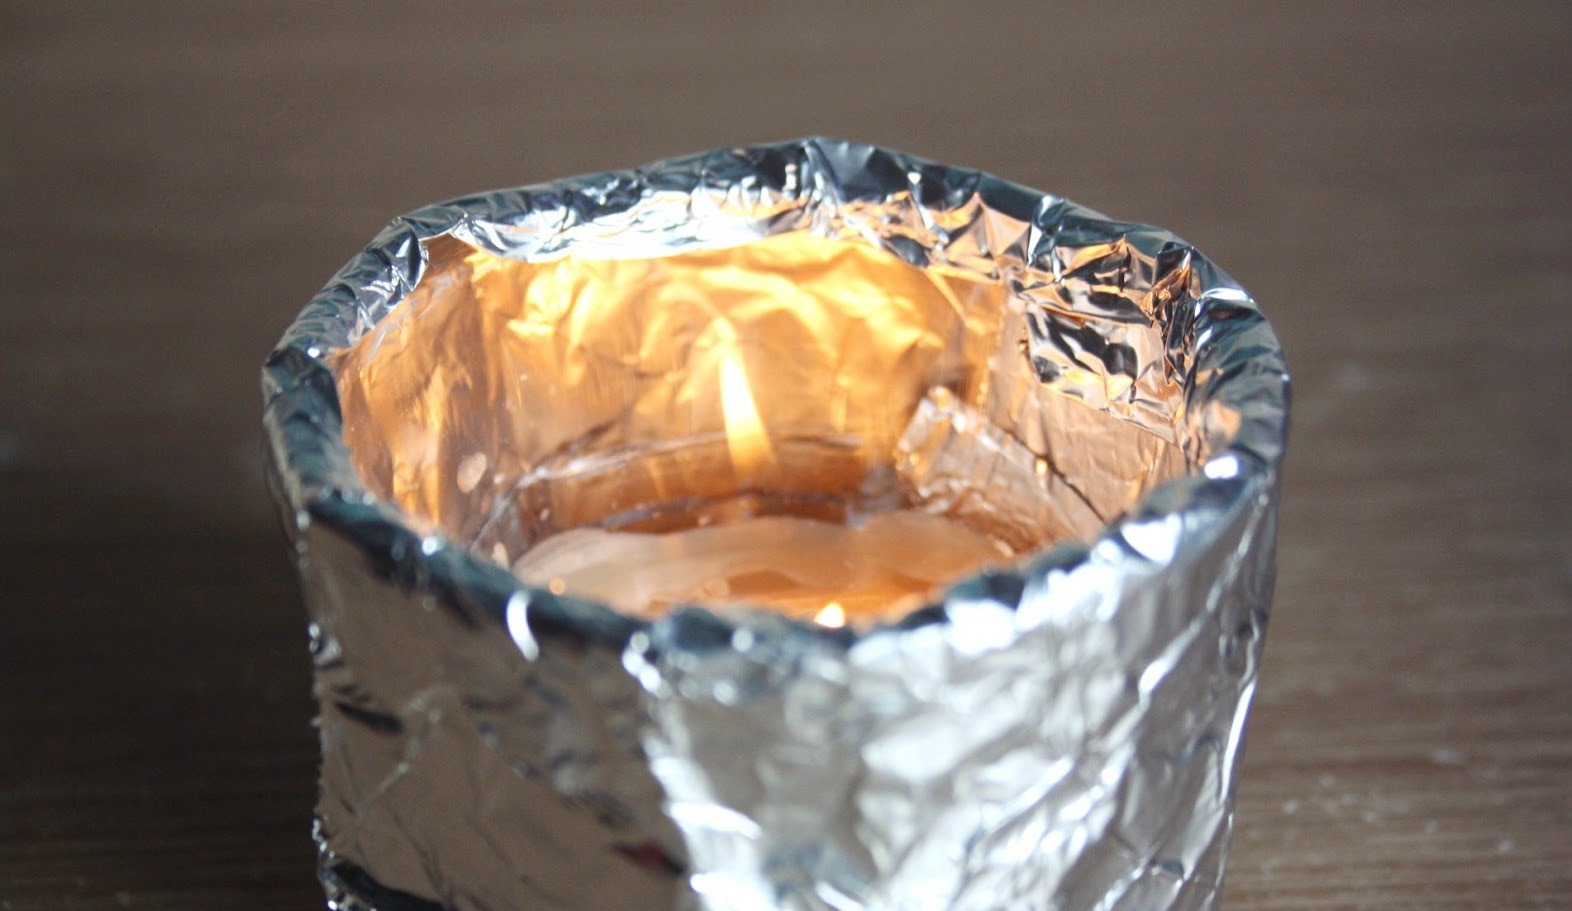
2. Wrap an aluminum foil around your candle's vessel (The Foil Method).
Cut the appropriate amount of aluminum foil to completely cover the top of your candle jar
Wrap this tightly around your candle jar
Light your candle and allow the heat to spread
Aluminum foil will retain the heat inside longer and give enough time for the sides to melt
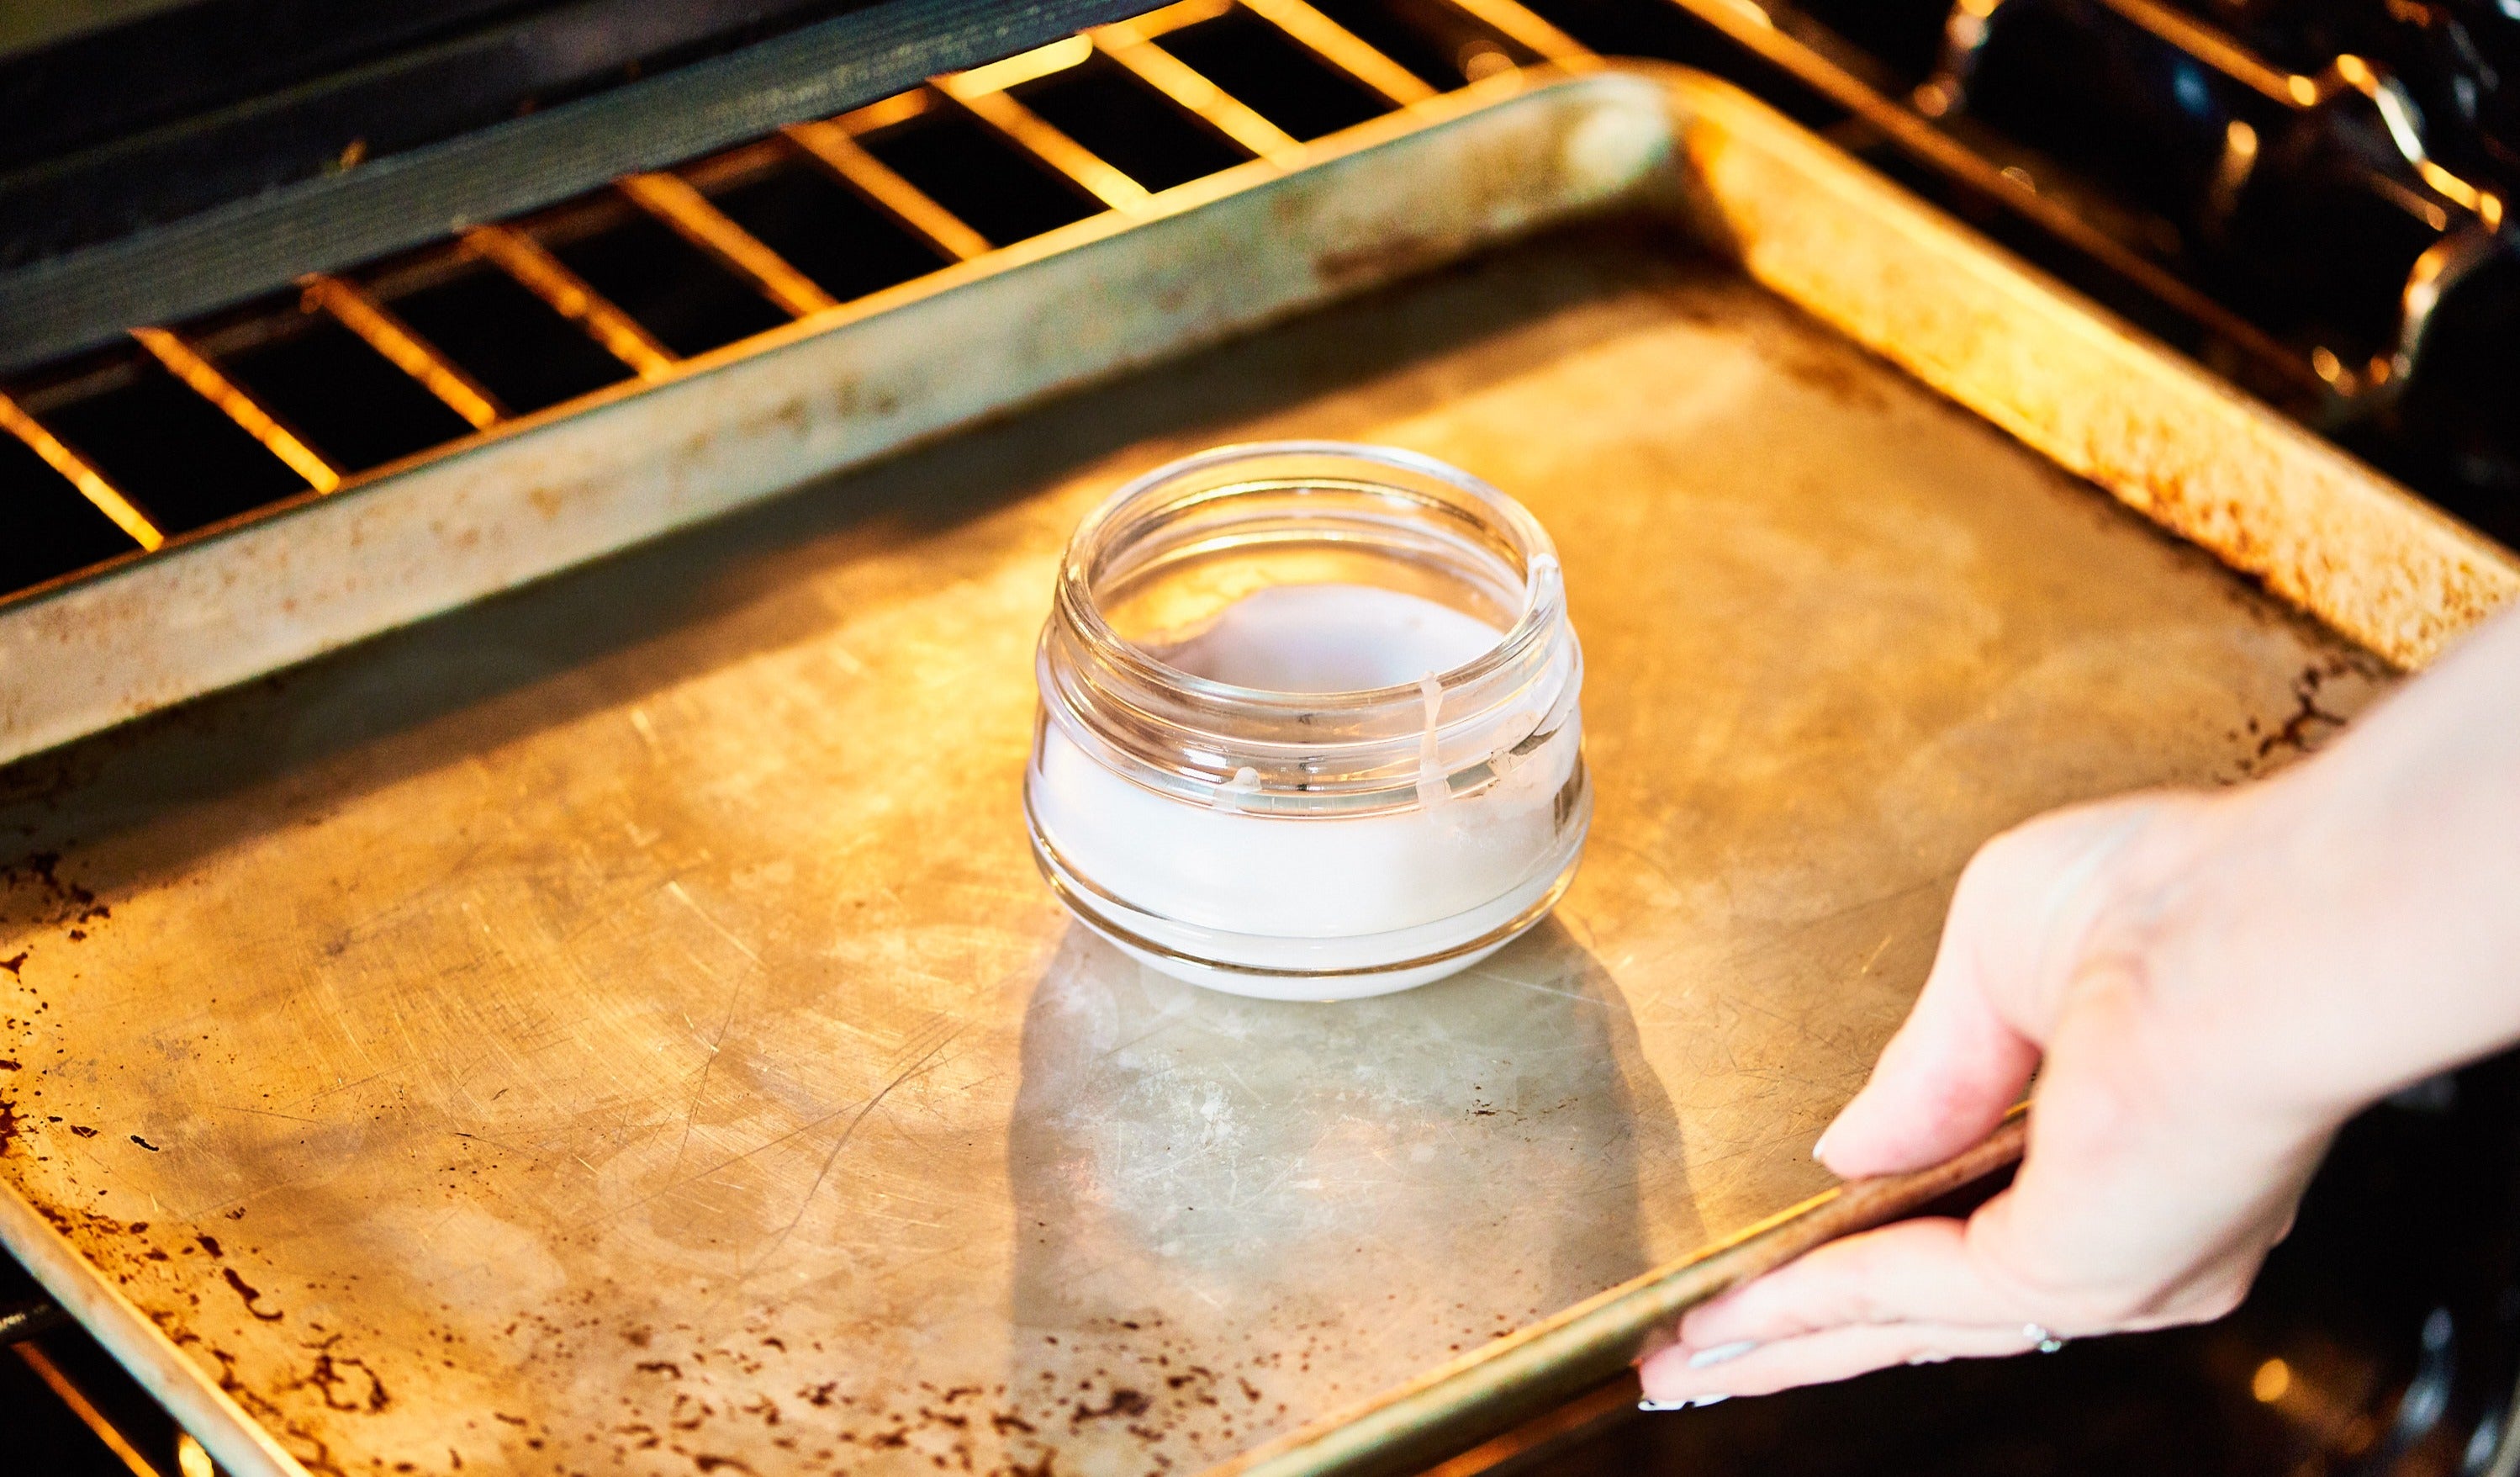
3. Pop it into the oven for 2 minutes.
Set your oven at around 80 Degrees Celsius / 175 Fahrenheit.
Heat for 2 minutes.
It will evenly melt the top of your candles giving it a smooth and even finish.
NOTE: DO NOT put your candles inside a microwave oven! Candles usually have metal wick butts that can be dangerous when put inside a microwave oven.
4. Get a candle topper.
A candle topper is a nice accessory that typically works like TIP 2 - The Foil Method. It serves as an insulator to keep the heat equally distributed for the wax to melt all the way to the edge.
5. Move the flame of your candle around.
Hold the container and tilt it to the uneven part of the candle
Intentionally melt the wax of your candles.
It's better to prevent these things before it actually happens. There are 3 simple tips to avoid candle tunneling when you light your first scented soy candle (LUMI).
How to Avoid Candles from Tunneling
1. Leave your candles lit up for a minimum of two hours every time you light them up
Let your candles burn 1-hour for every inch in diameter for easy trimming!
2. Let your candles create a wax pool
Allow your candles to heat up until the wax is melted all the way across the edge of their containers. This creates a flat surface on the top layer.
3. Place your candles away from fans or where the air is blowing
The flame should be staying still and pointed upwards to ensure even heat distribution and melting!
By the way, if you want to have a look at our scented soy candles (LUMIs), you can check our full collection.
Frequently Asked Questions
Can you microwave a candle to fix tunneling?
No. Candles usually have metal wick butts that can be dangerous when put inside a microwave oven.
Why does my candle not burn evenly?
The heat is generated from the middle so that is the area that would burn faster. Ensure that you burn your candle for 3-4 hours so the heat can spread through the entire candle surface.
How do I get my candle to burn evenly?
You can use a candle topper.
The simplest way is really to let your candle burn for 3-4 hours at a time.
Why do I get sinkholes in my candles?
Sinkholes occur when the wax cools much too quickly. Two things can cause this
You poured the hot candle wax into a cool container
You poured the candle wax too hot and it didn’t cool enough.
I’m reaching out because it looks like your company is using custom candle packaging, that’s great.
I am Mark Bradley here with BOXO Packaging. We can make any type of packaging as per your requirements. Our company is offering a 20% Discount on the 1st Packaging Order with us.
Free Shipping to your doorstep all over USA,UK and Canada,
We offer No Die & Plate Charges, Free Designing, and Free Shipping.
I can also send you a Free Sample Kit to check the quality of our boxes.
Currently our company is making packaging for the following companies Also:
• Diptyque.
• Boy Smells.
• Homesick.
• Tone Candle
Can you please share the prices that you are currently paying for your packaging needs, and I’ll surely beat them in a clear way for you?
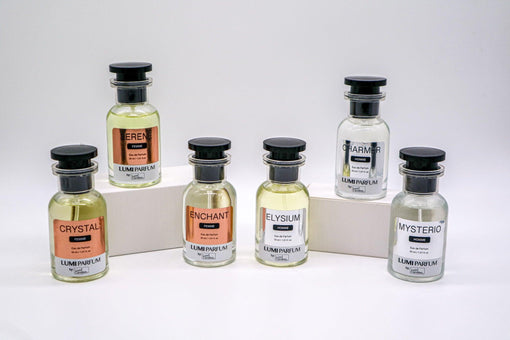
Step into a world of timeless elegance and refined sophistication with the unveiling of our newest creation: the LUMI Parfum (Eau de Parfum) collection. Crafted with meticulous attention to detail and an unwavering commitment to quality, each fragrance in this collection is a symphony of captivating notes that embodies the essence of youth and elegance. Designed to appeal to both men and women, our collection features six distinct scents, each carefully curated to evoke emotions and leave a lasting impression. From the enchanting allure of "Crystal" to the mysterious depths of "Mysterio," our perfumes offer an olfactory journey like no other, inviting you to indulge in the art of scent and elevate your everyday experiences.
Each perfume in our collection boasts a long-lasting formula that ensures you stay enveloped in your favorite scent for 8 hours or more, perfect for all-day wear. Conveniently sized at 30ml, our perfumes are ideal for on-the-go touch-ups or jet-setting adventures, allowing you to carry your signature scent with you wherever life takes you. With our commitment to sustainability, your new fragrance will arrive in eco-friendly hard box packaging, and you have the option to personalize your purchase with a message card, making it the perfect gift for yourself or a loved one!
For Women
1. Serene
The 'Serene' LUMI Parfum Pour Femme effortlessly embodies the grace and confidence of a sophisticated woman. With a captivating blend that exudes confidence––it's perfect for evening occasions, ensuring you feel chic and poised all night long.
Scent Notes:
Top: Apple, Orange, Bergamot, Juniper
Heart: Lavender, Rose
Base: Vanilla, Sandalwood
Recommended Wear: Nighttime
2. Enchant
The 'Enchant' LUMI Parfum Pour Femme is a celebration of feminine empowerment, radiating beauty, and confidence like a magical fairy. Its floral and green notes create a refreshing and rejuvenating aura, ideal for various occasions from formal events to corporate gatherings.
Scent Notes:
Top: Dried Lemon, Green Apple
Heart: Geranium, Ylang Ylang, Lily of the Valley
Base: Apricot, Vanilla, Moss, Cinnamon
Recommended Wear: Daytime
3. Crystal
The 'Crystal' LUMI Parfum Pour Femme is tailored for the spirited and youthful woman embracing life's vibrant moments. Whether it's a relaxed Sunday brunch or an adventurous outdoor escapade, this fragrance leaves an unforgettable impression with its playful blend.
Scent Notes:
Top: Peach, Jasmine
Heart: Black Currant Bud, Iris, Rose
Base: Musk, Amber
Recommended Wear: Daytime
For Men
1. Elysium
The 'Elysium' LUMI Parfum Pour Homme is a refreshing blend capturing the carefree essence of a sunny afternoon. Designed for the energetic and spirited gentleman, it's a perfect choice for daily wear, infusing every moment with vibrant joy.
Scent Notes:
Top: Apple, Lime, Neroli, Ginger
Heart: Juniper, Cardamom
Base: Leather, Sandalwood
Recommended Wear: Daytime
2. Mysterio
The 'Mysterio' LUMI Parfum is a sophisticated blend designed to evoke a sense of mystery and intrigue. Ideal for evenings and special occasions, its captivating aroma leaves a lasting impression, drawing others into its enigmatic allure.
Scent Notes:
Top: Neroli, Eucalyptus
Heart: Lavender, Rose
Base: Moss, Cedarwood, Sandalwood, Vanilla, Amber
Recommended Wear: Nighttime
3. Charmer
The 'Charmer' LUMI Parfum Pour Homme embodies the effortless charm of a true gentleman. With its refined blend, it enhances confidence and magnetism, making it perfect for various occasions, from casual outings to more formal events.
Scent Notes:
Top: Ylang Ylang, Bergamot, Lemon
Heart: Lavender, Myrrh
Base: Vanilla, Sandalwood
Recommended Wear: Daytime
FAQs
Which is better EDT or EDP?
It depends on the occasion and/or your preference. Eau de Toilette (EDT) is lighter between the two and will last you for 4-7 hours, perfect for everyday use. On the other hand, Eau de Parfum (EDP) is a much stronger blend and can last for up to 8 or more hours, making it more suitable for events and special occasions.
How should I apply these perfumes for best results?
For optimal results, we recommend applying our perfumes to pulse points such as the wrists, neck, and behind the ears. This allows the fragrance to interact with your body heat and skin chemistry, enhancing its longevity and projection.
Do you offer samples or testers of these perfumes?
At this time, we do not offer samples or testers of our perfumes. However, we stand behind the quality of our products and offer a satisfaction guarantee. If you're unsure about a particular fragrance, we recommend exploring our detailed scent descriptions or reaching out to our customer support team for assistance.
For more information about Lumi Candles PH and home decorating fragrances and accessories, feel free to visit the website and check out the full collection.
Do you have a question or an inquiry about transforming your space into a fragranced haven? Send us an email anytime at cozy@lumicandlesph.com, or book an Interior Design Consultation with our expert team of designers here.
Subscribe to our mailing list to receive more similar articles like this!
Facebook | Instagram | Twitter | Linkedin | TikTok | YouTube | Pinterest
Step into a world where ambiance is not only seen and heard but also delicately woven into the very fabric of scent—a world introduced by the pioneering service of Lumi Candles PH. As the trailblazers of venue fragrancing on a global scale, Lumi Candles is redefining the landscape of event experiences by introducing an innovative service that goes beyond traditional event planning. This blog serves as your exclusive pass into the aromatic realm curated by Lumi Candles, where fragrances become an integral part of crafting unforgettable moments.
The olfactory sense, often overlooked in the planning process, possesses a unique ability to forge emotional connections and trigger memories. Whether it's a wedding, a corporate gathering, or an intimate social soirée, the strategic integration of fragrance has become a pivotal aspect of event design. A carefully chosen scent can set the tone, create a sense of harmony, and enhance the overall experience for guests.
Inspiring Examples of Successful Venue Fragrancing Implementations
Imagine walking into a venue, and instantly, the air is imbued with a bespoke scent that captures the essence of the occasion. Lumi Candles PH is at the forefront of this sensory revolution, offering a groundbreaking service that elevates events through carefully curated fragrances. In this blog, we embark on an exploration of venue fragrancing, unveiling how Lumi Candles has harnessed the power of scents to enhance the atmosphere of weddings, corporate events, and social gatherings. From the meticulous selection of signature scents to the art of aroma customization, join us on a journey where Lumi Candles transforms ordinary events into extraordinary sensory experiences, leaving an indelible mark on the memories of attendees.
1. Janeena Chan and Morgan Say Wedding
TV and events host Janeena Chan and Engineer Morgan Say's Christmas-themed wedding was an enchanting blend of timeless elegance and festive charm, embodying the magic of the holiday season. Adorned with red-and-white Christmas ornaments, vibrant flowers, and uniquely styled plates, the venue transformed into a winter wonderland of Christmas romance. The reception, a feast for the senses, welcomed guests with the inviting aroma of Lumi Candles' Merry Cinnamon, enhancing the atmosphere through innovative venue fragrancing. This crafted an immersive experience that will surely linger in the hearts and memories of all attendees.
2. Francis Libiran 25th Sterling
World renowned fashion designer Francis Libiran's 25th Anniversary Gala, "Sterling," celebrated a quarter-century of the designer's iconic influence on the fashion world with timeless elegance. The event, a showcase of innovative design, saw the venue transform into a sophisticated masterpiece, further enhanced by the subtle touch of venue fragrancing. Lumi Candles' carefully curated scents, reflecting opulence and refinement, added a multi-sensory layer to the celebration, subtly wafting through the air and elevating the overall atmosphere. This thoughtful integration of fragrance transformed the gala into a sensory experience, encapsulating both the visual allure of fashion and the aromatic symphony that defined the essence of the evening. The scent used for this event was custom made for Francis Libiran, a fusion of sandalwood, leather, and amber, dubbed as the "Scent of Success."
PHOTO BY NICE PRINT PHOTO
3. Robi Domingo and Maiqui Pineda Wedding
TV host Robi Domingo and Maiqui Pineda's Filipiniana-themed wedding reception was a celebration that seamlessly blended cultural richness with personal elegance. The venue radiated the timeless charm of Filipino heritage, adorned with traditional elements and vibrant colors. Notably, it achieved an elevated ambiance through the implementation of venue fragrancing. Lumi Candles' carefully curated scents, complementing the Filipiniana theme, added a distinct olfactory layer, creating an immersive experience for guests. As the fragrance delicately filled the air, it harmonized with the visual splendor, ensuring that Robi and Maiqui's wedding reception became a truly sensorial celebration, where the essence of Filipino culture was delicately woven into every facet of the event. The scent used in this wedding is called "Scent of Love and Devotion," a blend of fresh, citrus, and powdery notes formulated to be the signature smell of the event.
PHOTO BY JAJA SAMANIEGO
4. Teddy Manuel Masterclass
Famous florist and event stylist Teddy Manuel's Masterclass was an unparalleled experience in event design, offering a rare insight into the creative genius of one of the industry's foremost experts. Attendees were treated to a masterful demonstration of Teddy's signature style, characterized by a harmonious blend of opulence and innovation. Beside Teddy Manuel in the photo is Rich, the founder and CEO of Lumi Candles PH. What made this masterclass exceptional was the innovative use of venue fragrancing by Lumi Candles, introducing an extra layer of sensory allure to the learning experience. Our signature scent Morning Flower, engaging participants on an olfactory level, transformed the atmosphere into an unforgettable and multi-sensory exploration of event design under the guidance of Teddy Manuel.
PHOTO BY NICE PRINT PHOTO
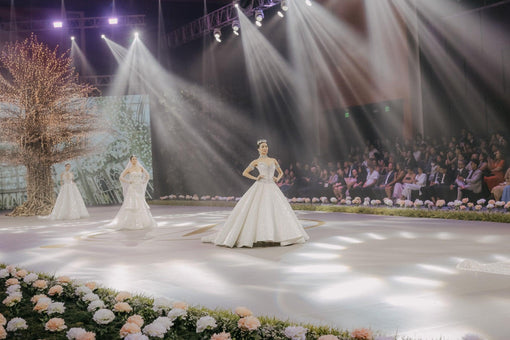
5. Marry Me At Marriott
The grandest wedding fashion show "Marry Me at Marriott" emerged as a pinnacle of exquisite matrimonial celebrations, setting a new standard for luxury weddings. Hosted within the elegant confines of Marriott's opulent venue, the event was a seamless fusion of romance and sophistication. What distinguished this affair was the meticulous integration of venue fragrancing, a touch that elevated the overall experience. Morning Flower, carefully curated by Lumi Candles, not only complemented the lavish surroundings but also introduced an immersive olfactory layer to the celebration.
FAQs
What is venue fragrancing?
It is a service proudly pioneered by Lumi Candles PH, incorporating fragrance in your event to make it a memorable and multi-sensory experience that will leave lasting impressions and evoke emotions among your guests.
Is the whole event venue covered by the fragrance?
Yes! Alternatively, you have the choice to designate specific areas or corners of the venue where you desire the scent to linger. For more information, please reach out to us via email at cozy@lumicandlesph.com.
How long does it take for the scent to take effect?
The scent may become noticeable within a span of 10-20 minutes, depending on the size of the venue.
How do we avail this service?
You may send an inquiry to our email at cozy@lumicandlesph.com for more details.
For more information about Lumi Candles PH and home decorating fragrances and accessories, feel free to visit the website and check out the full collection.
Do you have a question or an inquiry about transforming your space into a fragranced haven? Send us an email anytime at cozy@lumicandlesph.com, or book an Interior Design Consultation with our expert team of designers here.
Subscribe to our mailing list to receive more similar articles like this!
Facebook | Instagram | Twitter | Linkedin | TikTok | YouTube | Pinterest
As the most romantic day of the year approaches, what better way to express your love and affection than with the captivating allure of fragrances? Because nothing says "I love you" like a well-chosen aroma that says, "I put more thought into this than just grabbing the last bouquet at the grocery store." Whether you're celebrating decades of love or just starting to pen your love story, we've got something to make hearts flutter and smiles bloom.
Gone are the days of cliché chocolates and wilted gas station roses—let's elevate your gift-giving game to new heights. From candles that set the mood for a romantic evening, to perfumes that make you want to nuzzle closer, we've got recommendations that will have Cupid taking notes! After all, love is in the air, and with our help, you'll be the MVP of Valentine's Day in no time!
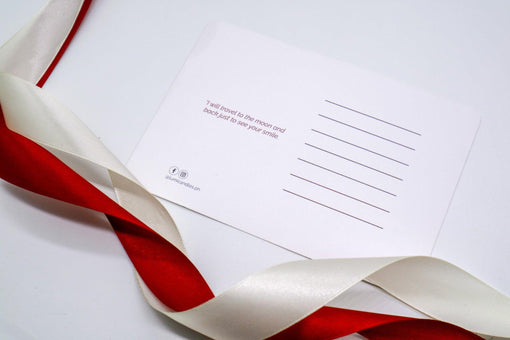
Indulge in the essence of romance with Lumi Candles PH's exclusive Valentine's Day Special Bundles, crafted to infuse your celebration with passion and allure. In line with our commitment to environmental responsibility, all Valentine's Day Gift Set orders will be thoughtfully packed in eco-friendly brown Kraft boxes, ensuring that your tokens of affection are not only beautiful but also environmentally conscious. Every order also comes with a free postcard where you can compose a personal message, expressing your heartfelt love and affection for your loved one.
1. Valentine's Day Special Parfum Bundle
For those who believe that scent is the ultimate expression of affection, our Valentine's Day Special Parfum Bundle is the perfect choice. This delightful package includes not one, but two parfums of your choice. With this bundle, you can double the enchantment and create a symphony of scents that will linger long after Valentine's Day has passed.
2. Valentine's Day Special Gift Package A
For those looking to immerse themselves in a sensory journey, this package offers an all-encompassing experience! Embrace the art of seduction with a luxurious parfum, meticulously crafted to enchant and beguile. Illuminate your surroundings with the soft glow of a 250ml frosted glass candle, casting a spell of intimacy and warmth. Enhance the ambiance further with a reed diffuser, ensuring that love lingers in the air long after the flames have dimmed. And to add a touch of elegance, delight your senses with a delicate dried flower bouquet, symbolizing the eternal beauty of your love.
3. Valentine's Day Special Gift Package B
Alternatively, immerse yourself in the captivating aroma of our Valentine's Day Special Gift Package B, which offers a luxurious combination of ambiance and fragrance. This indulgent bundle features two 250ml frosted glass candles in scents of your choice, accompanied by a reed diffuser and two delicate dried flower bouquets, ensuring an atmosphere of romance and sophistication that lingers in the air.
4. Valentine's Day Special Gift Package C
For those who appreciate the beauty of simplicity, this bundle is designed for those who prefer a more minimalist approach to gifting, where every element speaks volumes without overwhelming. This package includes one 250ml frosted glass candle in a scent of your choice, accompanied by a beautifully arranged dried flower bouquet.
5. Valentine's Day Special Gift Package D
For those who believe in doubling the delight, this bundle offers an abundance of love and fragrance that is reminiscent of Package C, but amplified twofold! This deluxe package features not one, but two 250ml frosted glass candles in scents of your choice, accompanied by two intricately arranged dried flower bouquets.
FAQs
Can I mix and match scents in your Valentine's Day gift sets?
Of course! Our Valentine's Day Special Bundles are designed to be customizable, allowing you to mix and match scents according to your liking. Simply select your desired scents when placing your order, and we'll ensure that your Valentine's Day gift set is curated to perfection.
How do I choose the right scent for my partner?
When selecting a scent for your partner, consider their personality, preferences, and lifestyle. Pay attention to the fragrances they already enjoy wearing or the scents they gravitate towards in their home. You can also choose a scent that evokes a special memory or represents a shared experience, adding a sentimental touch to your gift.
What if I'm unsure of what scent or product my partner would like?
If you're unsure of your partner's preferences or simply want to give them the freedom to choose their own gift, you can opt for a LUMI e-gift card starting at ₱500. This way, they can select the scents and products that resonate with them most, ensuring that they receive a gift they'll truly appreciate.
For more information about Lumi Candles PH and home decorating fragrances and accessories, feel free to visit the website and check out the full collection.
Do you have a question or an inquiry about transforming your space into a fragranced haven? Send us an email anytime at cozy@lumicandlesph.com, or book an Interior Design Consultation with our expert team of designers here.
Subscribe to our mailing list to receive more similar articles like this!
Facebook | Instagram | Twitter | Linkedin | TikTok | YouTube | Pinterest

Comments 1
I’m reaching out because it looks like your company is using custom candle packaging, that’s great.
I am Mark Bradley here with BOXO Packaging. We can make any type of packaging as per your requirements. Our company is offering a 20% Discount on the 1st Packaging Order with us.
Free Shipping to your doorstep all over USA,UK and Canada,
We offer No Die & Plate Charges, Free Designing, and Free Shipping.
I can also send you a Free Sample Kit to check the quality of our boxes.
Currently our company is making packaging for the following companies Also:
• Diptyque.
• Boy Smells.
• Homesick.
• Tone Candle
Can you please share the prices that you are currently paying for your packaging needs, and I’ll surely beat them in a clear way for you?